
game-data-editor-4
Date: 9/21/20 Tags: Tools, Svelte, Data, VSCode Permalink: /game-data-editor-vscode-part-4 Summary: Editing VS Code virtual document data from September 21, 2020
Date: 9/21/20 Tags: Tools, Svelte, Data, VSCode Permalink: /game-data-editor-vscode-part-4 Summary: Editing VS Code virtual document data from Svelte Title: Building a Game Data Editor in Visual Studio Code Part 4: Editing Data in Svelte —
This is part of a series of posts where I discuss building a game data editor inside of Visual Studio Code.
Part 1: Why?
Part 2: Custom Editors, Webviews, and Svelte
Part 3: Getting Data into Svelte
Part 4: Editing Data in Svelte
Bringing Cat Scratch Functionality to Svelte
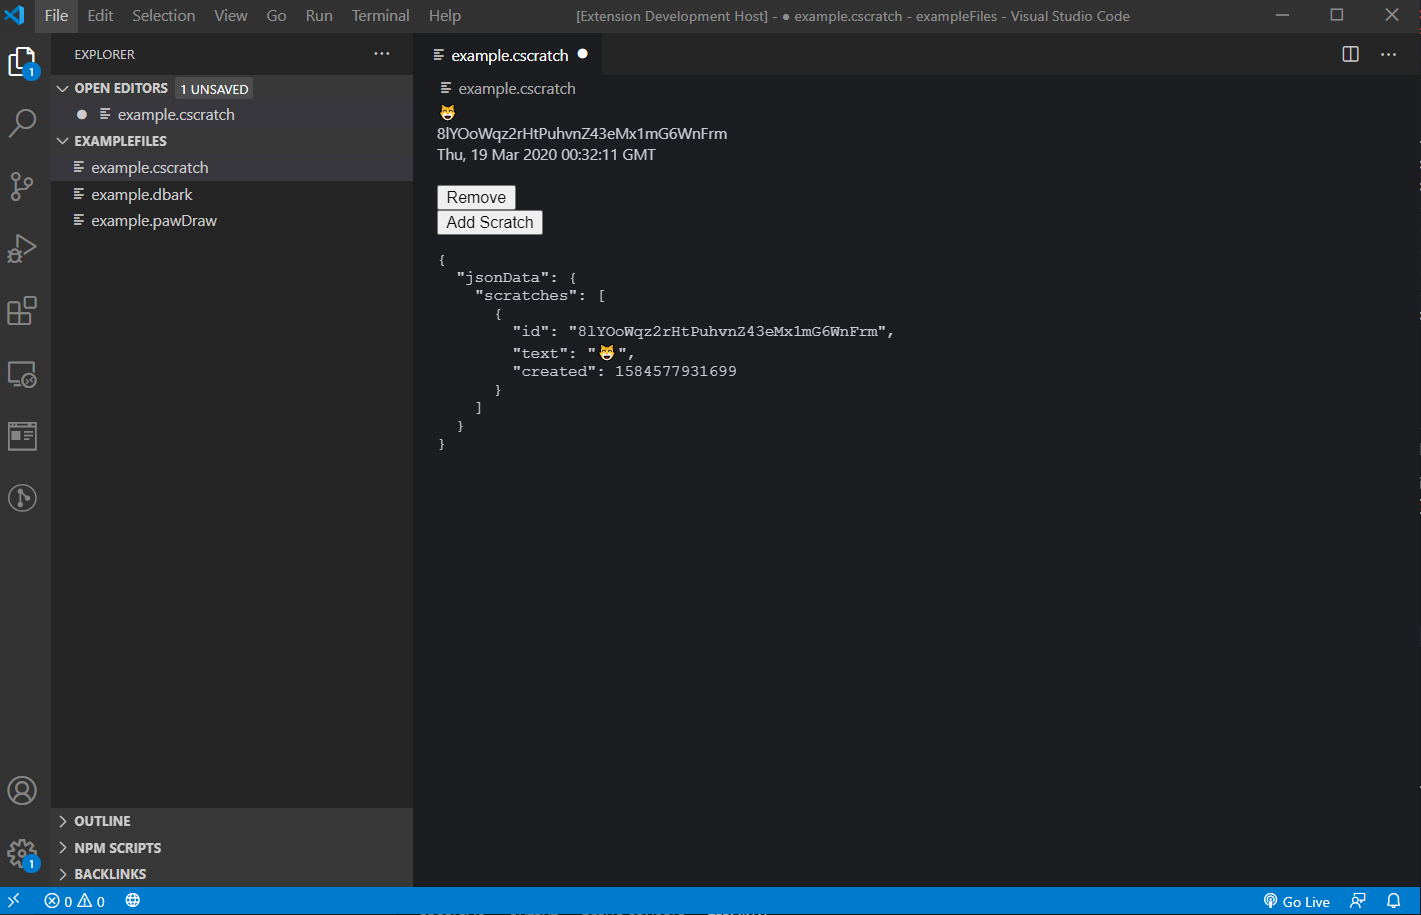
In the last part of this series, I showed you how to get data into Svelte. However, the key part of a data editor is the data editing part, so the focus of this post will be on how to edit the underlying data once you’ve got it exposed in Svelte. We’ll replicate the functionality of the Custom editor sample, which allowed you to add a new scratch, as well as delete a scratch.
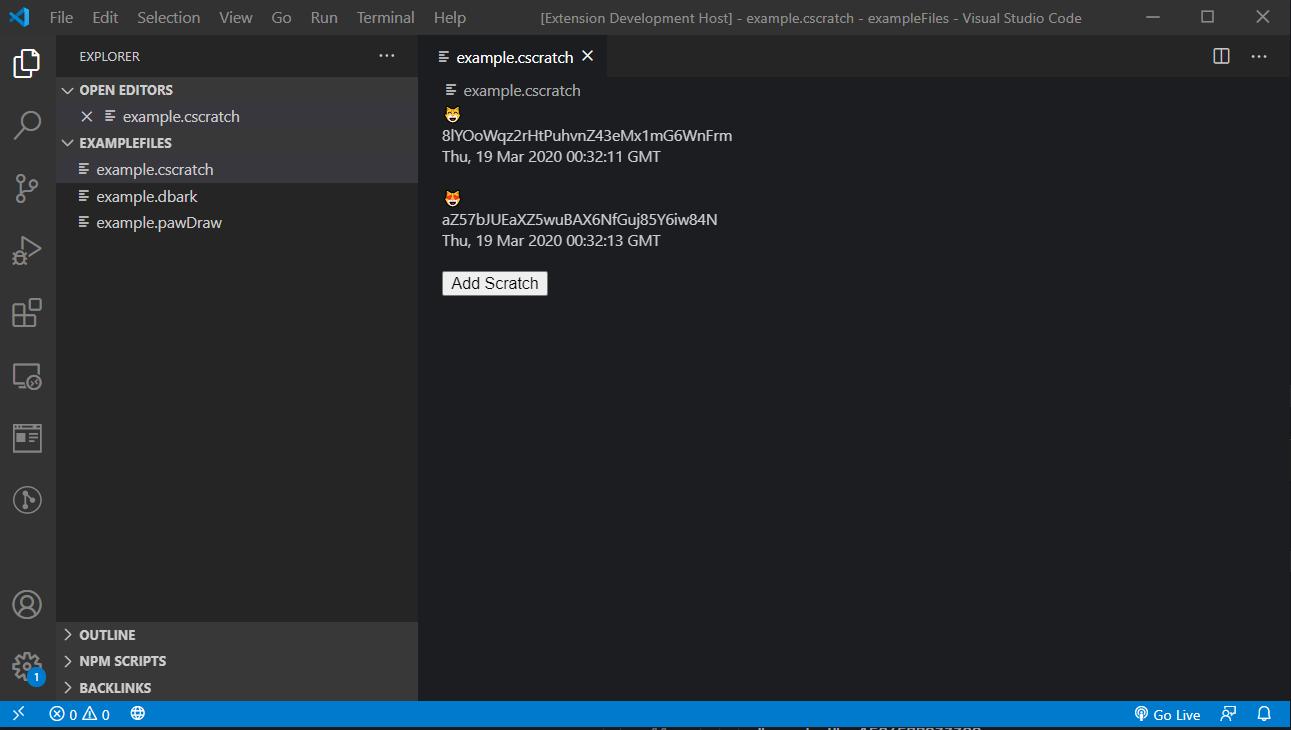
For reference, here’s the original editor:
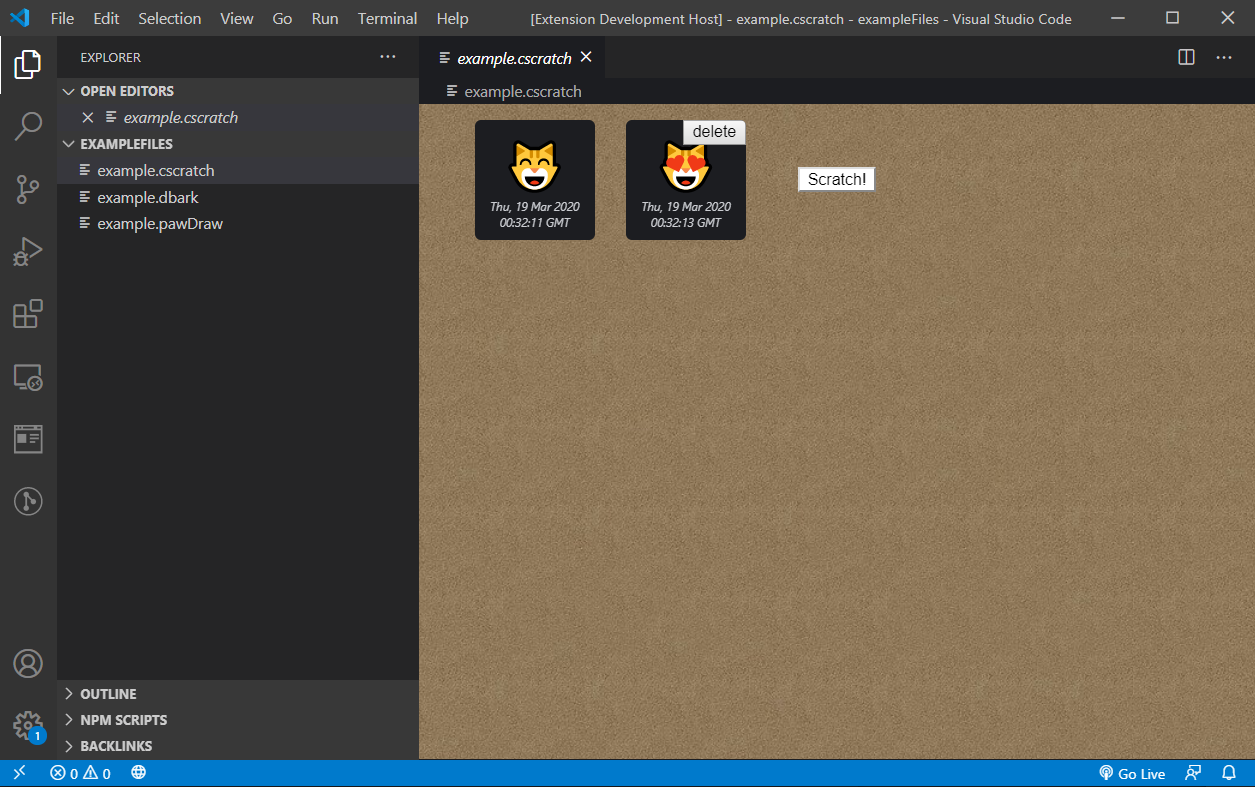
We should be able to do this (minus the css, I’ll leave that to you)!
Displaying Cats
Let’s get all the cats displayed first. I’m going to make a new Svelte component, Scratch.svelte, that can hold our scratch data. (I’m also getting rid of the old html Scratch button in the catScratchEditor.ts file). Here’s the basic Scratch.svelte:
<script>
export let data;
</script>
<div>
    <div>{data.text}</div>
    <div>{data.id}</div>
    <div>{new Date(data.created).toUTCString()}</div>
    <br>
</div>
It exports data so that App.svelte can give it data, and displays the contents of the data. It is worth saying that, if you don’t know Svelte, it’s not covered in the scope of this tutorial. I highly recommend their tutorial docs if you’re reading this and want to know more.
We then include Scratch.svelte in App.svelte:
<script>
    import { onMount } from 'svelte';
    import Scratch from './Scratch.svelte'; //added in
    ...continued
And now use #each to bring up a scratch component for each scratch we find in jsonData:
<svelte:window on:message={windowMessage}/>
{#if dataType == ""}
    <p>Loading</p>
{:else if dataType === "dbark"}
    <h1>WOOF</h1>
{:else if dataType === "cscratch"}
    {#each jsonData.scratches as scratch}
        <Scratch data={scratch}/>
    {/each}
{/if}
Running our extension we see:
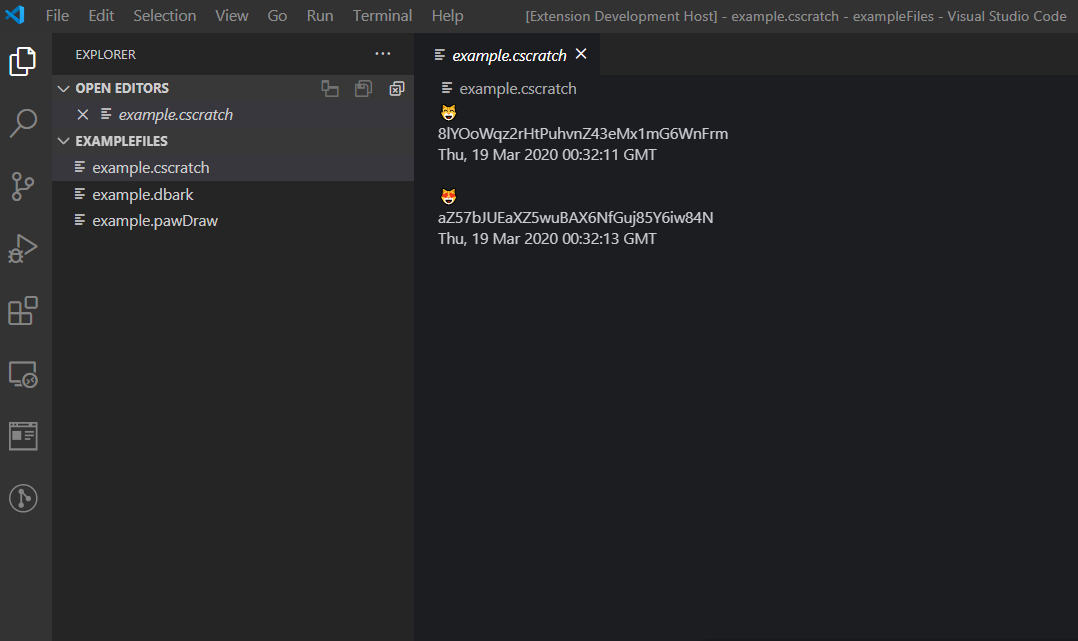
Great! We’ve now got pure Svelte showing us the underlying data, with each scratch found in example.cscratch turned into its own Svelte component.
Adding in Button Functionality
The initial Cat Scratch example editor had two buttons - one to delete a given scratch and another one to add a scratch. Let’s add the add scratch button first.
Adding a Scratch
Because the ability to add a scratch doesn’t have anything to do with the current scratches, we can add the button in the App.Svelte code after we display the current Scratches. We’ll bind the button as well to the addNewScratch function in the script code. Here’s the updated template code:
<svelte:window on:message={windowMessage}/>
{#if dataType == ""}
    <p>Loading</p>
{:else if dataType === "dbark"}
    <h1>WOOF</h1>
{:else if dataType === "cscratch"}
    {#each jsonData.scratches as scratch}
        <Scratch data={scratch}/>
    {/each}
    <button on:click={addNewScratch}>Add Scratch</button>
{/if}
To catScratchEditor.ts or App.svelte for functionality?
In the example, they put the addNewScratch code in catScratchEditor.ts, which we could still do - the json would update and then we’d catch the update event per the above code and our json in Svelte would update, but in the spirit of trying to encapsulate our functionality outside of the editor, especially if we’re treating the editor as the editor for multiple data types, let’s move the addNewScratch code to App.svelte. Here’s the first pass, just copying over the addNewScratch code from catScratchEditor.ts to App.svelte (and changing the data name to jsonData):
let scratchCharacters = ['😸', '😹', '😺', '😻', '😼', '😽', '😾', '🙀', '😿', '🐱'];
function addNewScratch() {
    let character = scratchCharacters[Math.floor(Math.random() * scratchCharacters.length)];
    jsonData.scratches = [
        ...(Array.isArray(jsonData.scratches) ? jsonData.scratches : []),
        {
            id: getNonce(),
            text: character,
            created: Date.now(),
        }
    ];
}
You can also see that that id is set from getNonce(), a function that was imported from util.ts in catScratchEditor.ts. Let’s convert that to js (since starting this series, Svelte now supports TS, so you could use it as TS) and then import it into App.Svelte. Here’s the new util.js:
export function getNonce() {
    var text = '';
    var possible = 'ABCDEFGHIJKLMNOPQRSTUVWXYZabcdefghijklmnopqrstuvwxyz0123456789';
    for (let i = 0; i < 32; i++) {
        text += possible.charAt(Math.floor(Math.random() * possible.length));
    }
    return text;
}
And here’s the updated script code in App.svelte:
<script>
//add in onMount
import { onMount } from 'svelte';
import Scratch from './Scratch.svelte';
import { getNonce } from './util.js';
//attach a function to onMount
onMount(() => {
vscode.postMessage({
type: 'init-view',
});
});
let dataType = "";
let jsonData = {};
function windowMessage(event) {...omitted}
let scratchCharacters = ['😸', '😹', '😺', '😻', '😼', '😽', '😾', '🙀', '😿', '🐱'];
function addNewScratch() {
let character = scratchCharacters[Math.floor(Math.random() * scratchCharacters.length)];
jsonData.scratches = [
...(Array.isArray(jsonData.scratches) ? jsonData.scratches : []),
{
id: getNonce(),
text: character,
created: Date.now(),
}
];
}
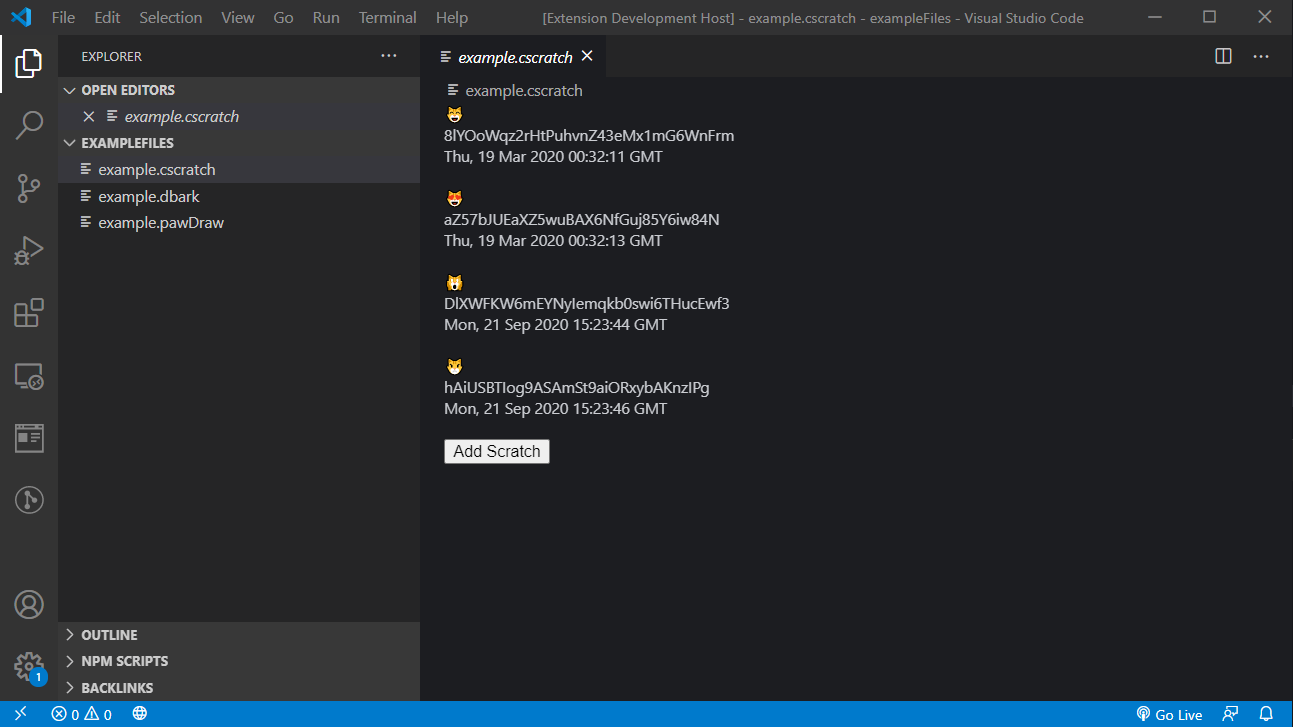
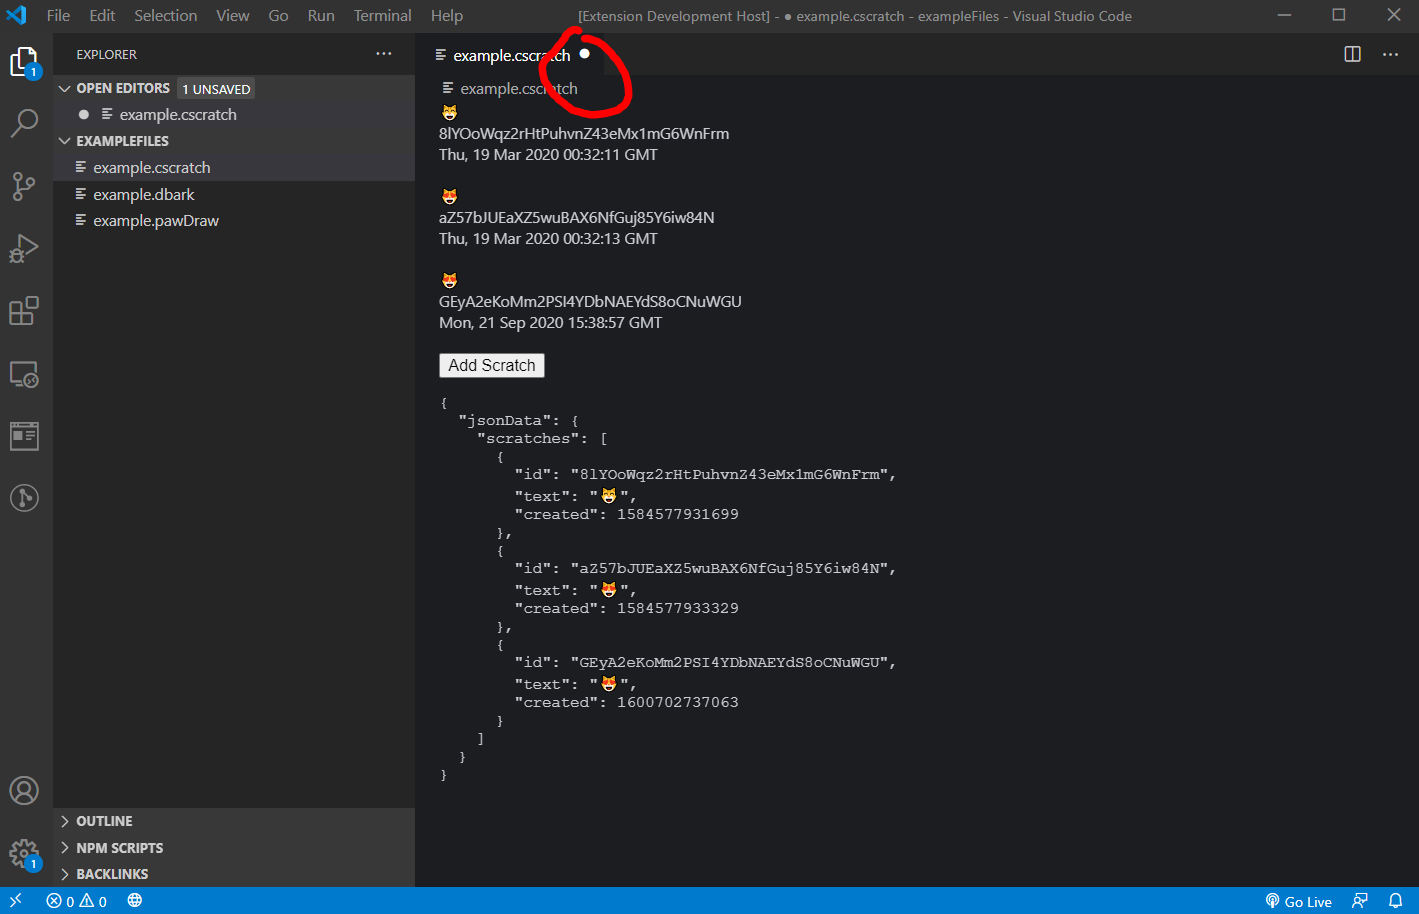
</script>Running the extension again, we can see that our Add Scratch button appears, and clicking it adds new scratches!
But wait! There’s an issue! If we try to save out changes, this happens:
Where did our other scratches go?
Welcome to the data maze of custom editor extension development! What’s happening is that, per the addNewScratch code we added in App.svelte, we’re definitely adding new Scratches to jsonData, but that new jsonData isn’t being pushed back to the extension to write the state to the virtual document. It’s why, once edited with new scratches, you don’t see that little white dot next to the file name in the first screenshot to indicate that there are changes to the document that need to be saved.
So what we need to do is send back our edited json to the extension, and have it update our virtual document. Luckily the sample extension already has the function to update the virtual document, so all we need to do is tell the extension to update the virtual document, using our new json. We can post an event from the App.svelte code, catch it in catScratchEditor.ts, and call the function. Here’s the code in App.svelte:
let scratchCharacters = ['😸', '😹', '😺', '😻', '😼', '😽', '😾', '🙀', '😿', '🐱'];
function addNewScratch() {
    let character = scratchCharacters[Math.floor(Math.random() * scratchCharacters.length)];
    jsonData.scratches = [
        ...(Array.isArray(jsonData.scratches) ? jsonData.scratches : []),
        {
            id: getNonce(),
            text: character,
            created: Date.now(),
        }
    ];
    // we add in a call to push the data back to the extension
    pushDataUpdate()
}

function pushDataUpdate() {
    //we send a new message of type "update" and send the new updated json
    vscode.postMessage({
        type: 'update',
        data: jsonData
    });
}
Now in the catScratchEditor.ts we catch the update event and call updateTextDocument with our sent json:
webviewPanel.webview.onDidReceiveMessage(e => {
    switch (e.type) {
        case 'add':
            this.addNewScratch(document);
            return;

        case 'delete':
            this.deleteScratch(document, e.id);
            return;
            case 'init-view':
            //split the filename and pop the last element for the extension
            let dt = document.fileName.split('.').pop(); //will be either cscratch or pawDraw
            webviewPanel.webview.postMessage({
                type: 'init',
                text: document.getText(),
                dataType: dt
                });
            return;
        case 'update': //added in this route
            this.updateTextDocument(document, e.data)
            return;
    }
});
Let’s run the extension again and see what happens:
We can see that adding new scratches now gives us that dirty indicator. And if we try to save:
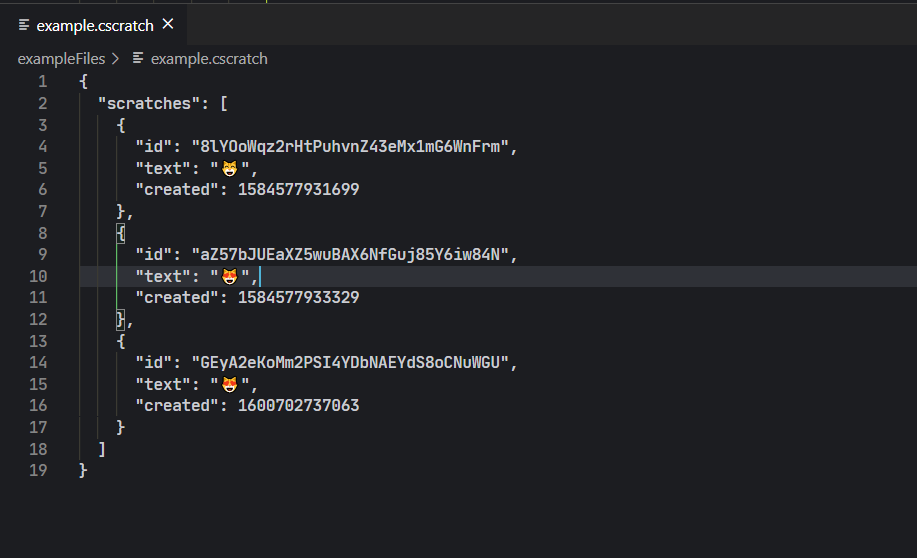
We can see that our data gets written to the file. Perfect!
Removing A Scratch
Let’s add in the ability to remove scratches now. We can update the Scratch.svelte component to add in a “Remove” button for that scratch. Here’s the first pass:
<script>
export let data;
function removeScratch() {

}
</script>
<div>
    <div>{data.text}</div>
    <div>{data.id}</div>
    <div>{new Date(data.created).toUTCString()}</div>
    <br>
    <button on:click={removeScratch}>Remove</button>
</div>
For removeScratch() we’ve got a few options here, all of which have plusses and minuses:
Option 1: Use Svelte stores for jsonData
This is a route that I think would probably be the best, but honestly I tried to get this working a lot and couldn’t find a way for it to make sense and not be un-wieldy to the whole process and scale with larger data trees. It also introduces another state-holding part of the app, which means it gets messy to sync things around.
Option 2: Event dispatcher
This would mean sending an event to App.svelte when the field is clicked to be deleted in the Scratch, and App.svelte handles the functionality of removal instead of the Scratch itself. This is fine, and would allow us to use the deleteScratch function from catScratchEditor.ts by sending the id of the scratch to be deleted from the scratch, and then deleting it in App.svelte. It gets slightly messy at scale, because App.svelte starts to accumulate a large switch block to catch different cases from other components.
Option 3: Data binding
We can also just bind the array directly to the component by using Svelte’s component bindings. Then the component would be able to edit itself from the Scratch and not really need to talk to App.svelte that much.
Let’s go with Option 3. Mainly because, though it adds a little bit of overhead for component config, it makes the actual editing of the data kept within the component itself vs. starting to bleed more functionality into the parent.
Right now, Scratch.svelte only has access to its own slice of the array from jsonData. Let’s give it what it needs to edit itself, bound access to its array, as well as its index. Then in removeScratch we can just do a normal array operation to remove the scratch:
<script>
export let scratches;
export let data;
function removeScratch() {
    scratches = scratches.filter(el => el !== data);
}
</script>
<div>
    <div>{data.text}</div>
    <div>{data.id}</div>
    <div>{new Date(data.created).toUTCString()}</div>
    <br>
    <button on:click={removeScratch}>Remove</button>
</div>
And then in App.Svelte, change the syntax in the layout code to use the bind keyword for the scratches passed to each scratch component:
<svelte:window on:message={windowMessage}/>
{#if dataType == ""}
    <p>Loading</p>
{:else if dataType === "dbark"}
    <h1>WOOF</h1>
{:else if dataType === "cscratch"}
    {#each jsonData.scratches as scratch}
        <Scratch bind:scratches={jsonData.scratches} data={scratch}/>
    {/each}
    <button on:click={addNewScratch}>Add Scratch</button>
    <pre>{JSON.stringify({jsonData},null,2)}</pre>
{/if}
Let’s run the extension and see what happens:
Clicking remove for one of the elements does indeed remove the element from the json, but you can see from the open tab that we don’t get that little white dot to indicate there was and edit. Sure enough, saving again makes the data revert back to its original state.
The issue again is that we need to push our edited jsonData state back to the extension. We can do this by tying in an eventDispatcher to the removeScratch function in Scratch.svelte:
<script>
import { createEventDispatcher } from 'svelte';
export let scratches;
export let data;
const dispatch = createEventDispatcher();
function removeScratch() {
    scratches = scratches.filter(el => el !== data);
    dispatch('message', {
            "type" : "update"
        });
}
</script>
<div>
    <div>{data.text}</div>
    <div>{data.id}</div>
    <div>{new Date(data.created).toUTCString()}</div>
    <br>
    <button on:click={removeScratch}>Remove</button>
</div>
And then listen for that message in the App.svelte template code with the on:message keyword:
<svelte:window on:message={windowMessage}/>
{#if dataType == ""}
    <p>Loading</p>
{:else if dataType === "dbark"}
    <h1>WOOF</h1>
{:else if dataType === "cscratch"}
    {#each jsonData.scratches as scratch}
        <Scratch bind:scratches={jsonData.scratches} data={scratch} on:message={handleMessage}/>
    {/each}
    <button on:click={addNewScratch}>Add Scratch</button>
    <pre>{JSON.stringify({jsonData},null,2)}</pre>
{/if}
And in our handleMessage function in App.svelte, call the same pushDataUpdate function we used for adding new scratches:
function handleMessage(event) {
switch (event.detail.type) {
case "update":
pushDataUpdate();
break;
default:
break;
}
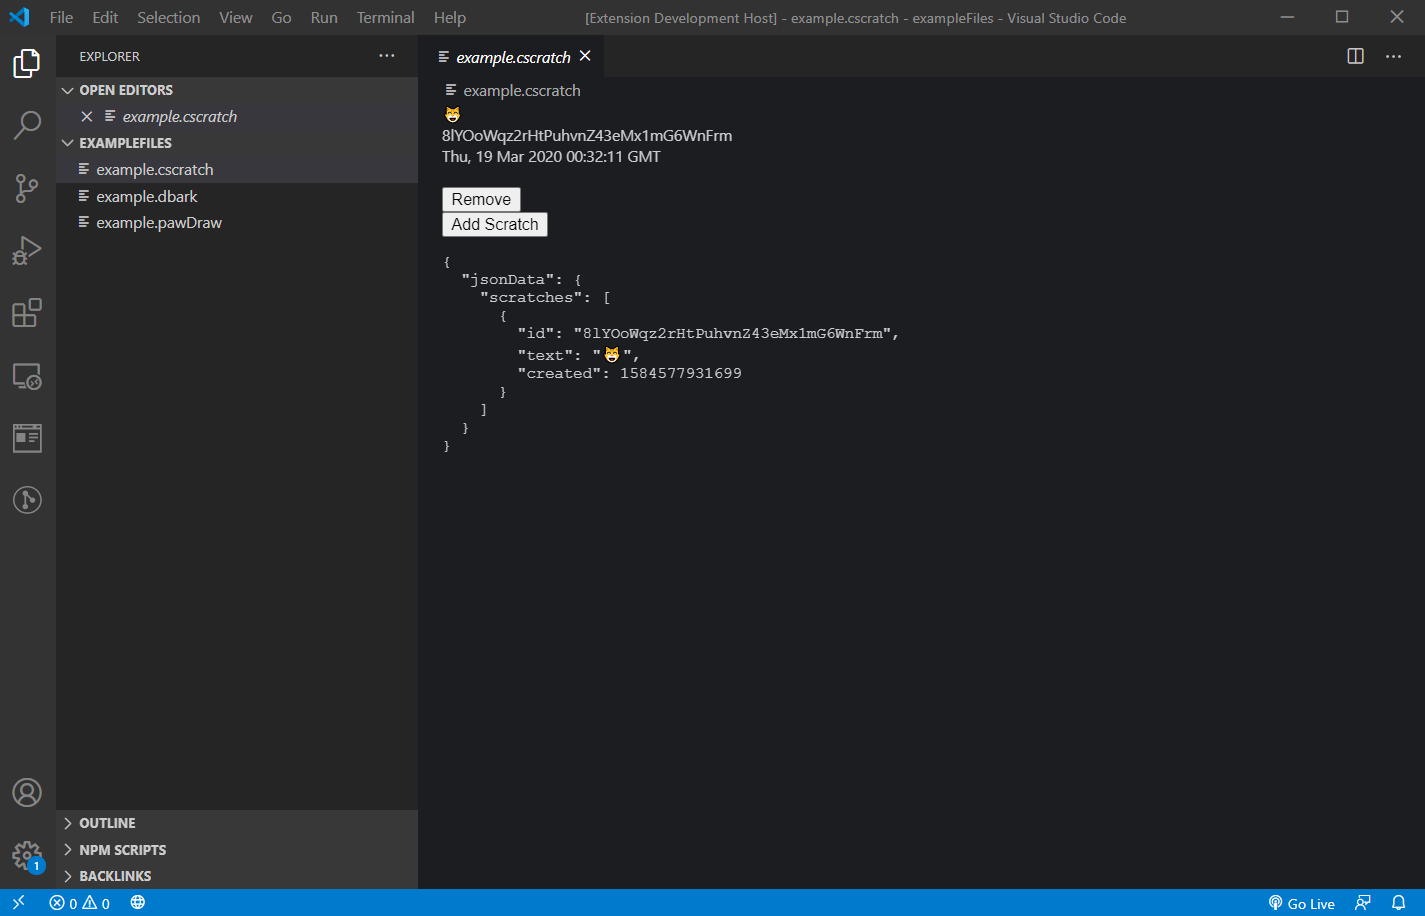
}If we run our extension again, let’s see what happens:
Removing updates the virtual document! And saving…

Properly updates the file! Nice!
Beyond Cat Scratch
At this point, we’ve built a custom editor in Svelte that allows us to preview and edit the underlying data for a VS Code Custom Editor extension. We’ve replicated the functionality in the from the sample extension, adding in the ability to add and remove scratches.
But what if we want more. For my game data editor, I’m doing a lot more, but as a small sample, what if you want some way to edit a field’s values individually? That way you could open up any json file and edit the data more like a form instead of needing to treat it like a text document.
Svelte makes this pretty easy!
Let’s imagine that we want to make all the fields on a Scratch editable, not just that we want to add or remove them from an array. In Scratch.svelte, we can convert those plain text display boxes to instead give us text fields. Additionally we can make it so that anytime the field is updated, we also push that update to the virtual document. Here’s the new Scratch.svelte code:
<script>
import { createEventDispatcher } from 'svelte';
export let scratches;
export let data;
const dispatch = createEventDispatcher();
function removeScratch() {
    scratches = scratches.filter(el => el !== data);
    dataUpdated();
}
function dataUpdated() {
    dispatch('message', {
        "type" : "update"
    });
}
</script>
<div>
    <div>face: <input bind:value={data.text} on:input={dataUpdated}></div>
    <div>id: <input bind:value={data.id} on:input={dataUpdated}></div>
    <div>date: {new Date(data.created).toUTCString()}</div>
    <br>
    <button on:click={removeScratch}>Remove</button>
</div>
In App.svelte, now that we want to give a Scratch the ability to directly edit its data, we now have to not only bind the array of scratches, but also need to update how we pass in the scratch prop so that we bind its value as well. Here’s the updated template code:
<svelte:window on:message={windowMessage}/>
{#if dataType == ""}
    <p>Loading</p>
{:else if dataType === "dbark"}
    <h1>WOOF</h1>
{:else if dataType === "cscratch"}
    {#each jsonData.scratches as scratch}
        <Scratch bind:scratches={jsonData.scratches} bind:data={scratch} on:message={handleMessage}/>
    {/each}
    <button on:click={addNewScratch}>Add Scratch</button>
    <pre>{JSON.stringify({jsonData},null,2)}</pre>
{/if}
Running our extension now, we see this:
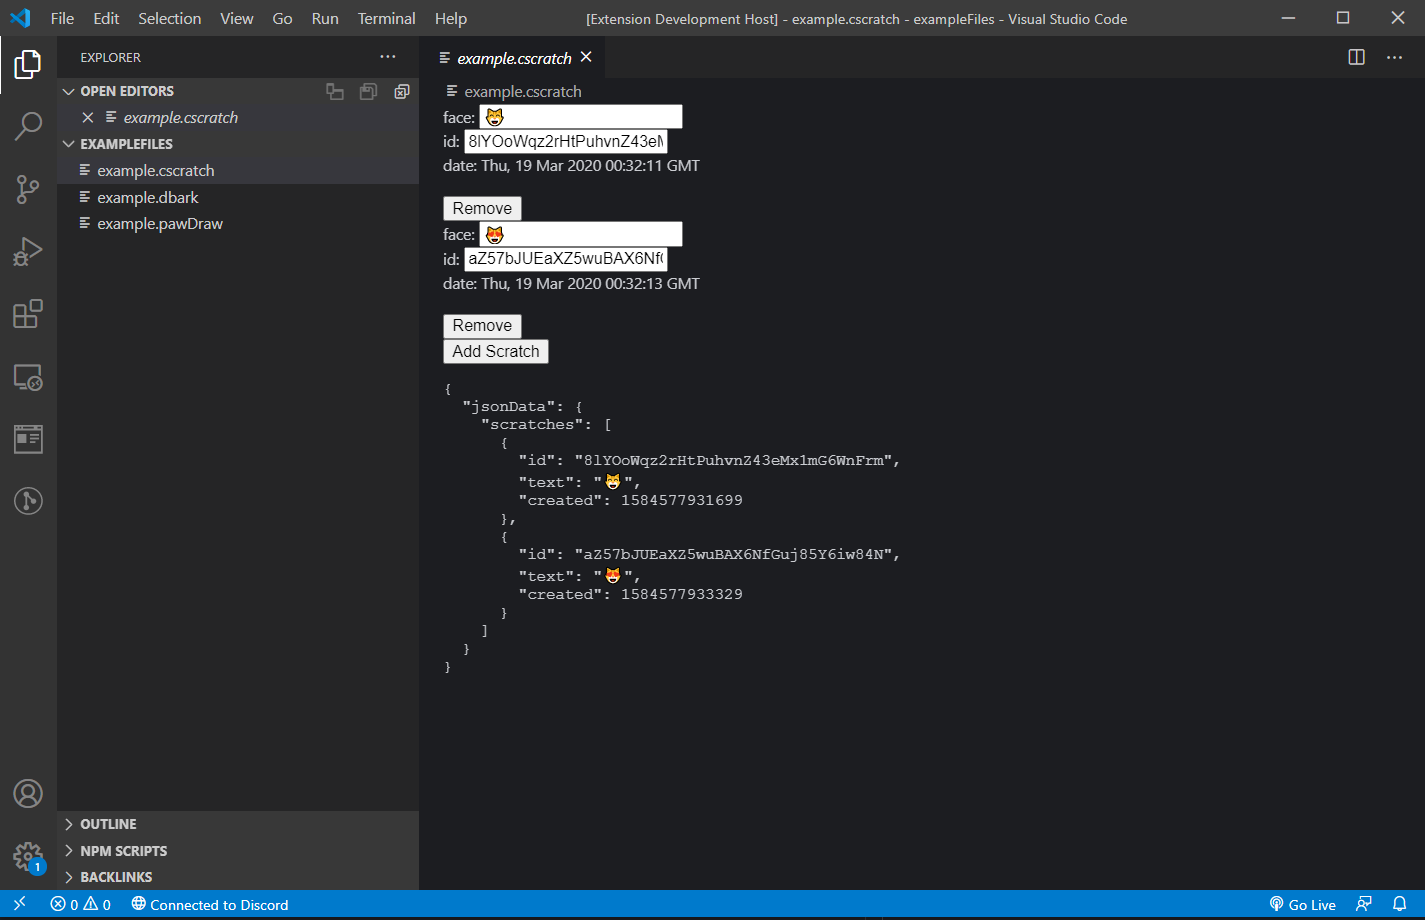
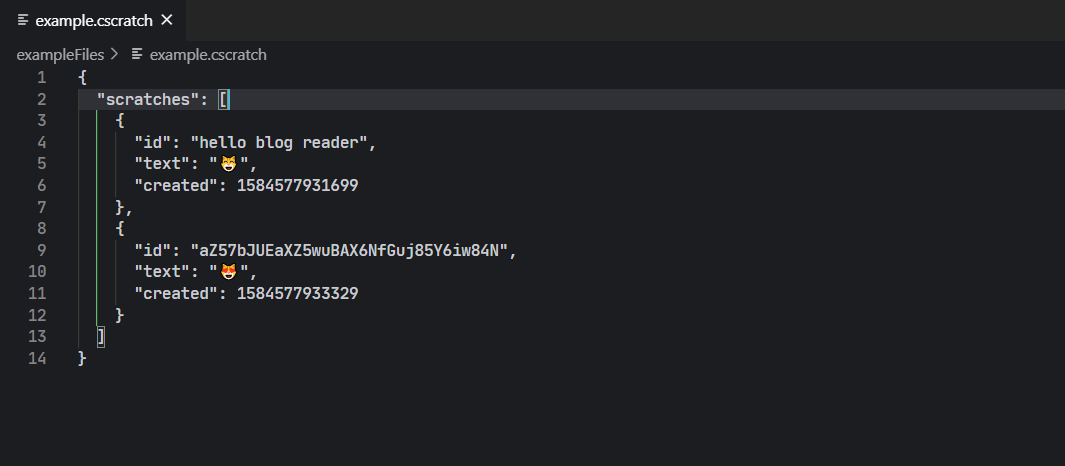
With only minor changes we’ve turned our previously read only data into directly editable fields! Watch the json below the html code when I edit the id field for a scratch:
And when I save the file, that’s written out to the underlying data!
Conclusion
This process has formed the backbone of how I’m building my new game data editor inside of Code. The next post in this series will likely be much more editorial, describing how I’m choosing to implement my editor, but the material presented across this post and the previous posts in this series should be enough to allow you to get started making your own basic editors in code!
I’ve also uploaded the final code for this series of posts on Github here. Feel free to use it as a reference.
Thanks for reading! The next parts in this series will likely be up later, but I wanted to produce this first series while all the initial setup required was top of mind. Otherwise I would have been too deep down the hole and not remember where I started! Writing this was great as it acted as a way for me to sort of review what I learned along the way, so I hope you find it useful as well.
This is part of a series of posts where I discuss building a game data editor inside of Visual Studio Code.
Part 1: Why?
Part 2: Custom Editors, Webviews, and Svelte
Part 3: Getting Data into Svelte
Part 4: Editing Data in Svelte
Date
September 21, 2020subscribe to my newsletter to get posts delivered directly to your inbox